To create a Choicer Voicer dub pack, open the free Dub Pack Maker, load an MP4 or OGV video, choose Automatic mode, select the part of the video you want and press Create pack. Pack Maker removes the voices to make a backing track, transcribes every line, sorts the lines by character and cuts them into clips. You name the characters, press Download ZIP, and the pack is ready to dub. It takes about five minutes, and most of that is waiting.
Watch the one-minute tutorial
The video builds a two-character pirate scene from start to finish. The steps below follow the same project and cover what the video goes through quickly.
What is in a dub pack?
A dub pack is a ZIP that the Choicer Voicer Studio imports as a playable scene. Each spoken line becomes one recording prompt with a caption, a character and a cue frame. This is the pack made in the video:
source section.zip
├── dub_video.mp4
├── _backing_track.m4a
├── _pack_info.ini
├── 001_Captain.wav  .txt  .jpg
├── 002_Parrot.wav   .txt  .jpg
├── 003_Captain.wav  .txt  .jpg
└── 004_Parrot.wav .txt .jpg- dub_video.mp4 (or .ogv): the scene, trimmed to your selection.
- _backing_track.m4a: the scene's audio with the voices removed. It plays under your takes.
- _pack_info.ini: title, author and icon.
- One .wav, .txt and .jpg per line: the original line, its caption, start time and character, and a cue frame.
Building this by hand means typing every caption, setting the start and end of every clip, and finding a dialogue-free version of the audio. Automatic mode does all three for you.
MP4 or OGV? The original Choicer Voicer game only imports packs with OGV video. Pack Maker exports both formats: an OGV pack for the game, and an MP4 pack that works directly in the Studio on thechoicervoicer.app. You pick the format when you download, in step 5.
What you need
- A video. MP4 or OGV, up to 2 GB. A scene of thirty seconds to two minutes makes a good first pack. Use footage you have permission to use.
- A desktop browser. Chrome, Edge or Safari. Nothing to install.
Step 1: Open Pack Maker and load your video
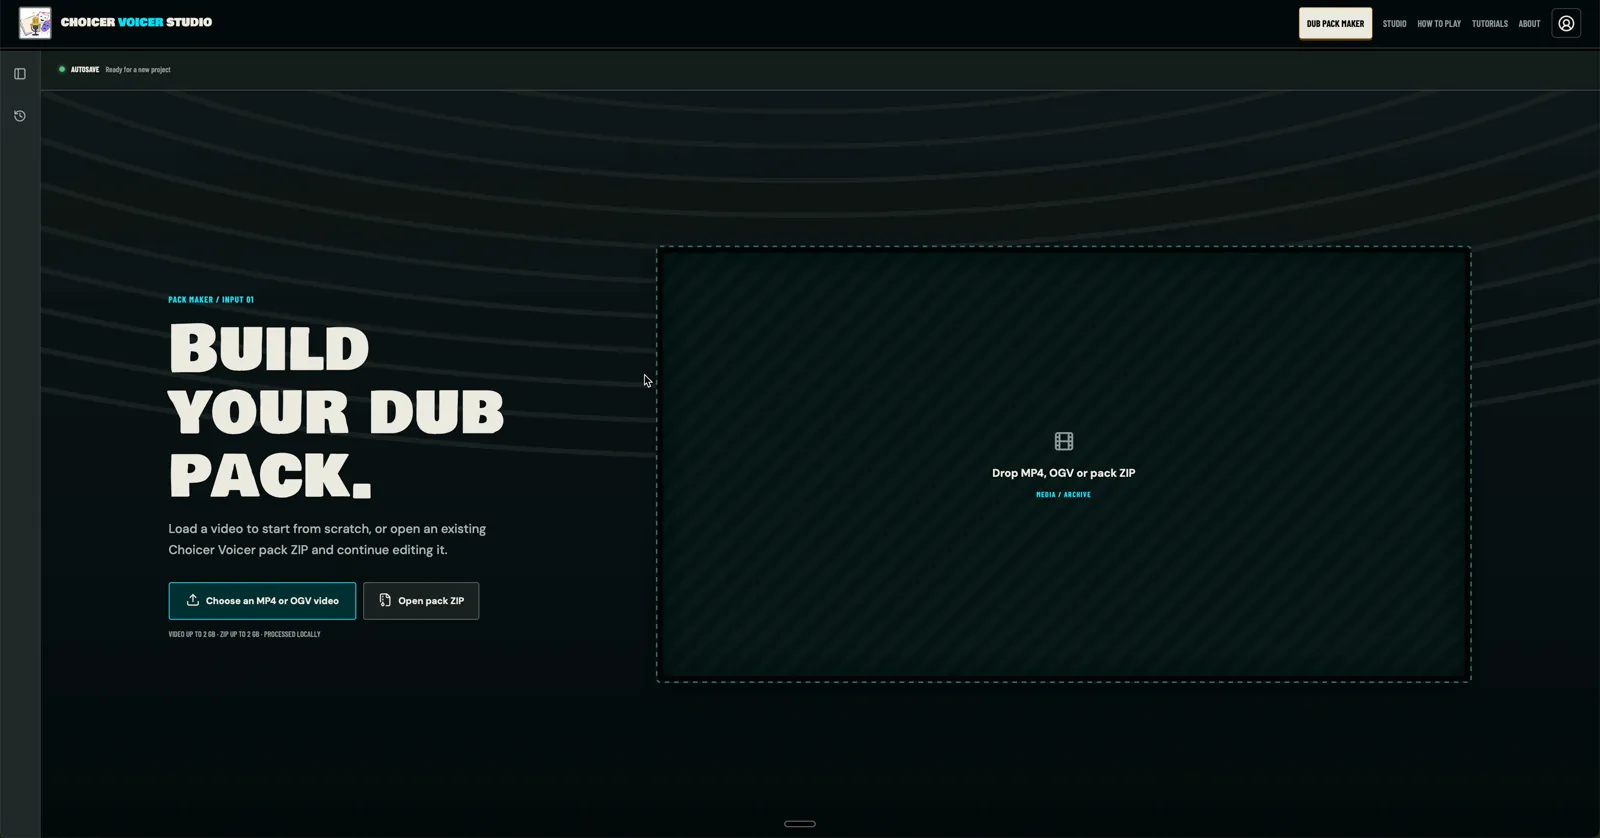
Go to thechoicervoicer.app/pack-maker and press Choose an MP4 or OGV video, or drop the file onto the dashed box. Open pack ZIP is for editing a pack you already have. The video is read in your browser and nothing is uploaded at this point.
Step 2: Choose Automatic mode
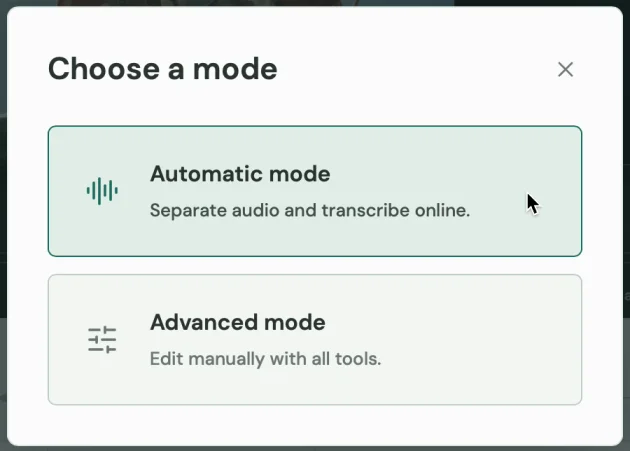
Once the video loads, Pack Maker asks how you want to work:
- Automatic mode separates the audio and transcribes it online. You get clips, captions, characters and a backing track. This guide uses it.
- Advanced mode is fully manual: place clips yourself, import SRT or VTT subtitles, or separate vocals locally. It uses no minutes.
You are not locked in. The Automatic mode button stays in the toolbar.
Step 3: Select the scene and press Create pack
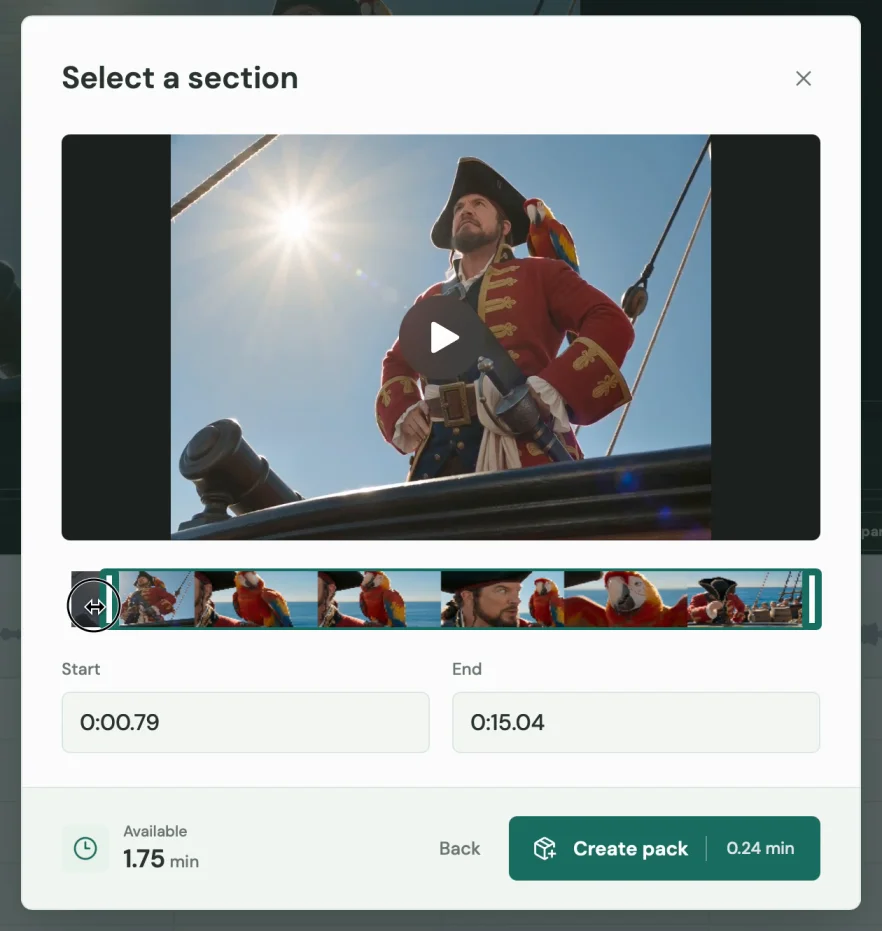
Drag the two handles on the filmstrip to where your scene starts and ends, or type exact Start and End times. The play button previews the selection. Only this section is processed, and only this section goes into the pack.
The button shows the cost before you commit. The 15-second pirate scene cost 0.24 minutes, and Available shows what is left. The first time, the button says Sign in with Google. After you sign in your selection comes back and you confirm it.
Processing takes a minute or two, which is why the video fast-forwards here. Separation and transcription run at the same time. If the page refreshes or the download is interrupted, open Pack Maker again and it resumes the same job without charging twice. A job that fails or finds no speech gives the minutes back.
Step 4: Check the clips and name your characters
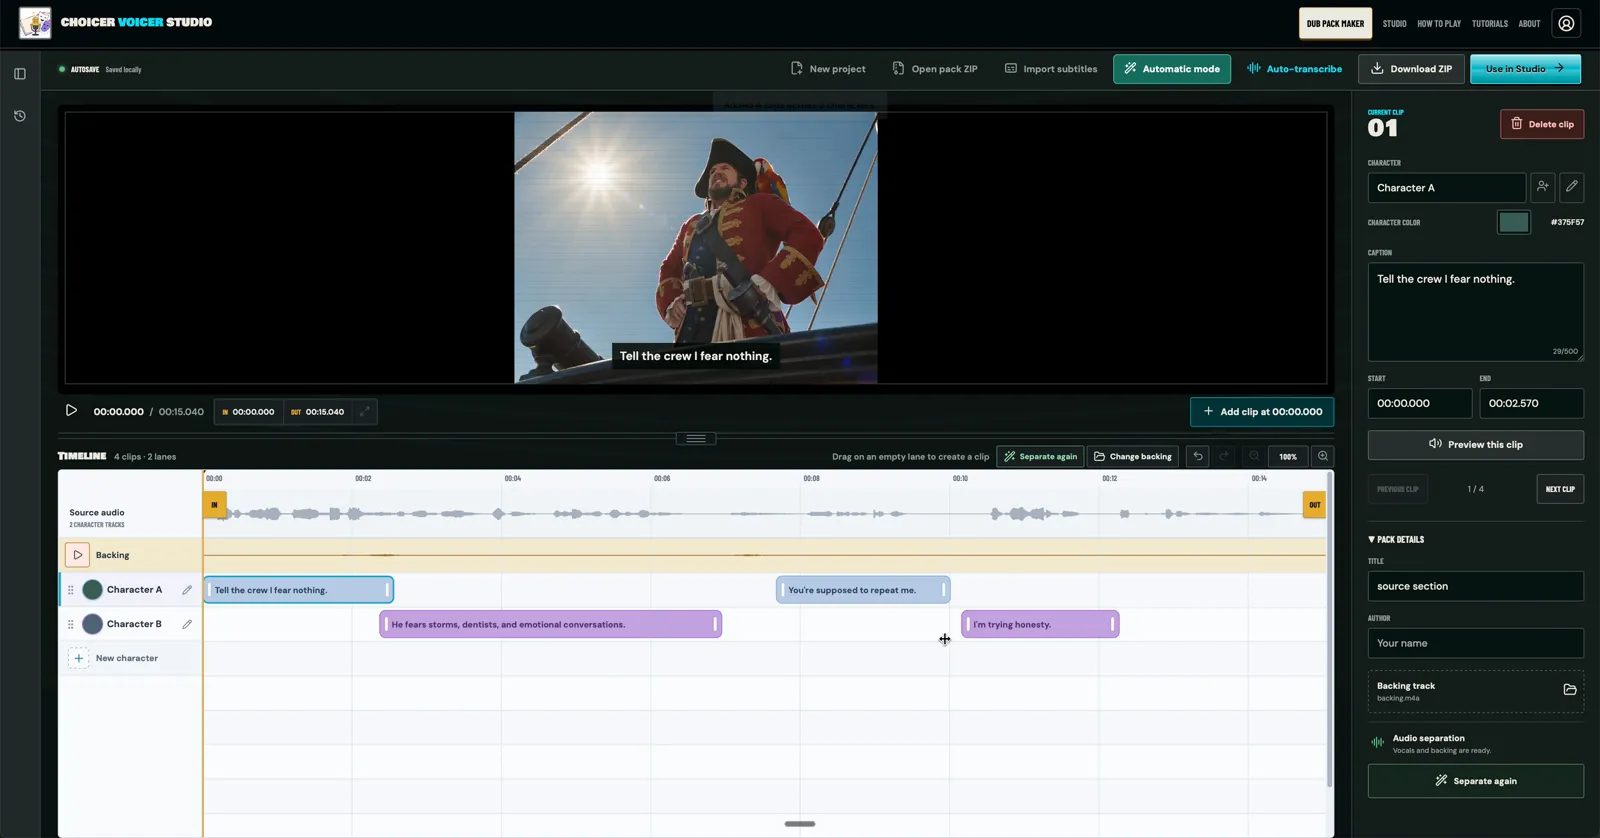
When the job finishes, the timeline fills in. Every line is a clip with its caption already typed, and every voice has its own lane: Character A, Character B and so on. The orange Backing lane is the scene's audio without the voices.
Click the pencil next to Character A and type a real name. It renames that character on every clip at once. In the video they become Captain and Parrot. Then go through the clips once:
- Click a clip to edit its Caption in the right-hand panel. Players read this while they record, so fix any word the transcription got wrong.
- Drag a clip's edges if it starts after the first word or runs into the next speaker.
- If a line went to the wrong voice, select it and type the right name in Character.
- Preview this clip plays the selected line so you can check it.
Step 5: Add a title and download the ZIP
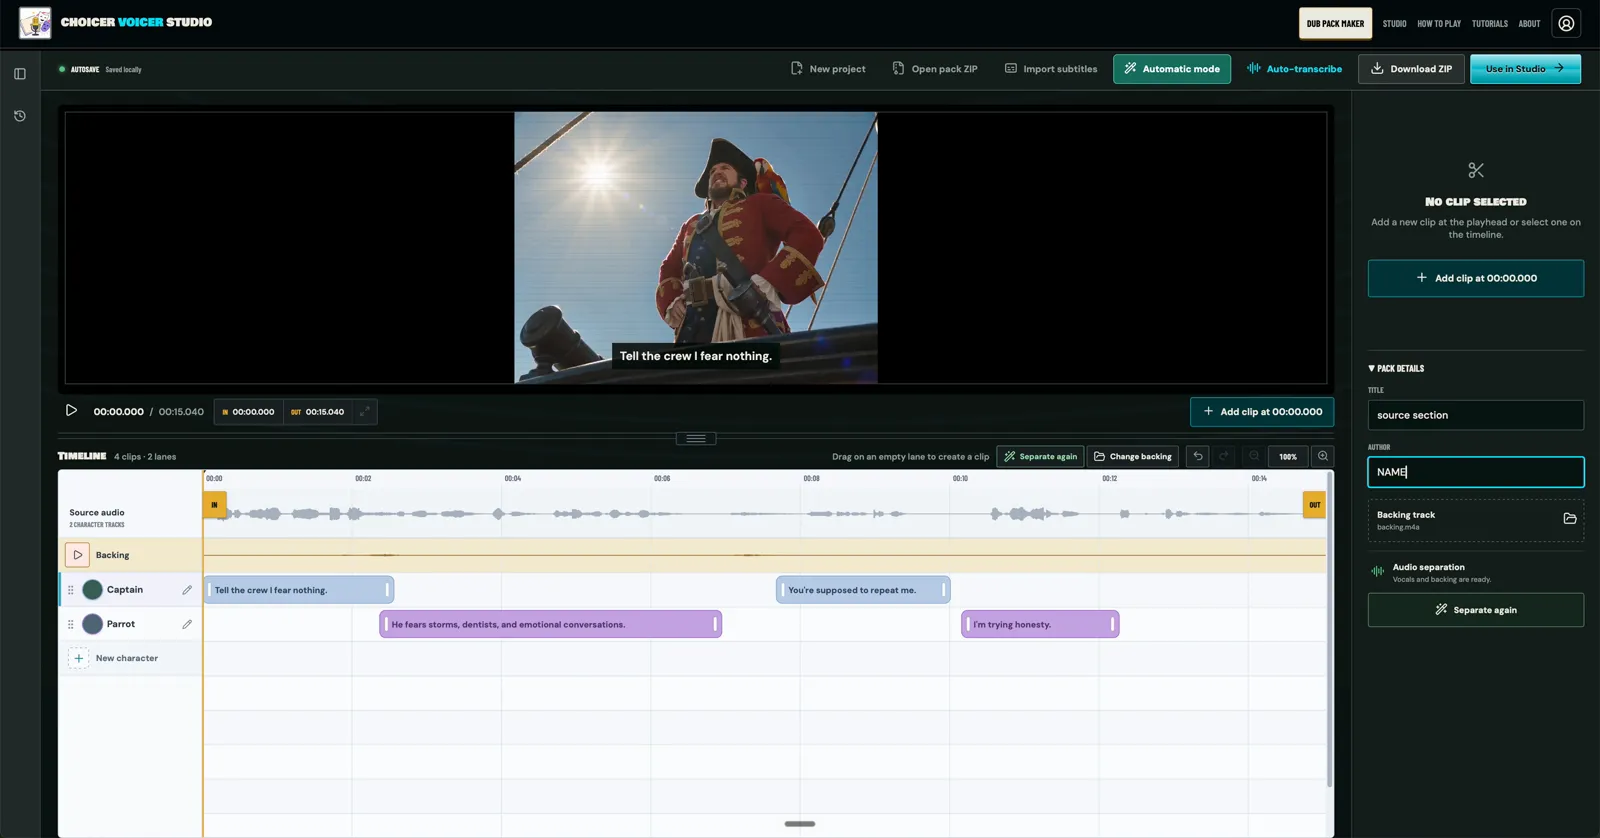
Under Pack details, set the Title (it starts as the file name) and put your name in Author. Then press Download ZIP and pick a format:
MP4 pack (default)
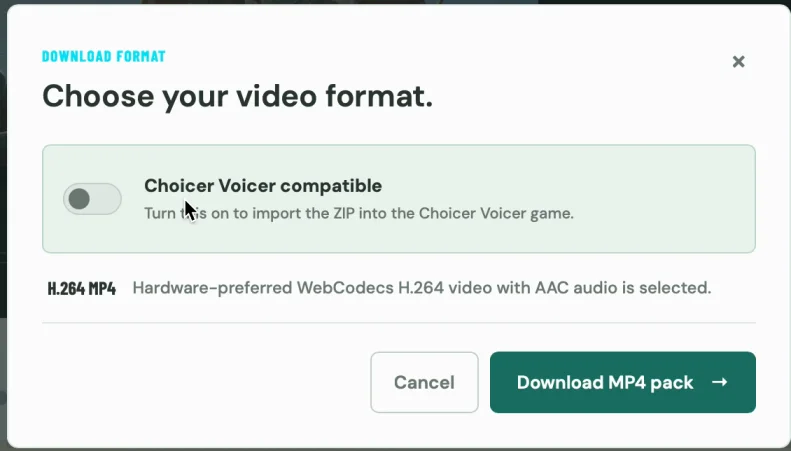
Leave Choicer Voicer compatible off. H.264 video with AAC audio, ready in seconds. Use it in the Choicer Voicer Studio on desktop and mobile.
OGV pack
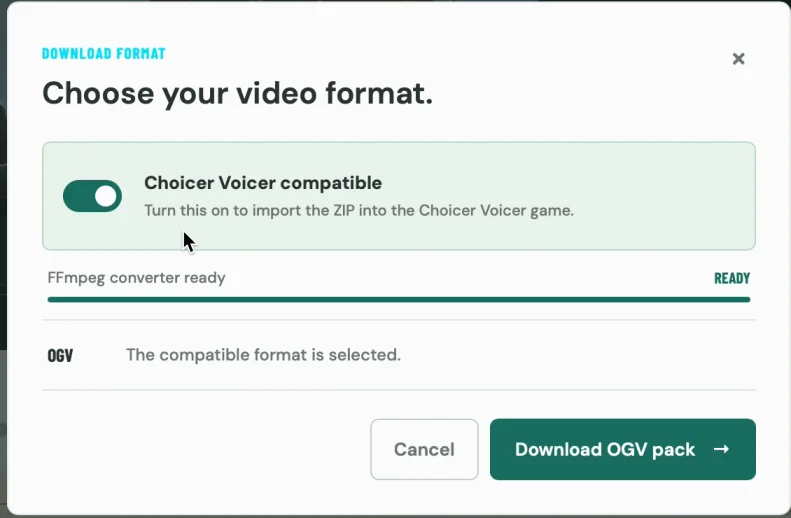
Switch Choicer Voicer compatible on to import the ZIP into the Choicer Voicer game. The video is converted in your browser, so it takes longer. Keep the tab open until the ZIP downloads.
Use in Studio skips the download. It builds the pack and opens it in the Studio so you can start recording straight away.
Test it before you share it
Import the ZIP in the Studio with Upload pack ZIP, play each line once with Hear clip, and record one take. A caption typo is harmless. A clip that cuts off the first word means going back to the timeline. To dub it with friends, send everyone the same ZIP and follow the multiplayer guide.
FAQ
Is Pack Maker free?
Editing, Advanced mode and ZIP export are free. Automatic mode uses processing minutes, charged by the length of the section you select.
Is my video uploaded?
The video is not. In Automatic mode only the audio of the selected section is sent for separation and transcription. The results are saved in your browser and the cloud copy is then deleted.
How long can the video be?
The source file can be up to 2 GB and the section has no fixed length limit. Longer sections cost more minutes and are harder to dub, so short scenes work best.
What if I run out of minutes?
Switch to Advanced mode. You can import SRT or VTT subtitles, add clips by hand, separate vocals locally on a computer that supports WebGPU, or add a dialogue-free track you already have.
Should I export MP4 or OGV?
MP4 for the web Studio. OGV only when you want to import the pack into the Choicer Voicer game.
Can I edit the pack later?
Yes. Open pack ZIP in Pack Maker loads it back for editing. The project also autosaves in your browser, but keep the ZIP as your real copy.
Open Pack Maker and turn one short scene into your first dub pack.